Sunday, August 29, 2010

MY CROOKED HOUSE

Well darlings, I finally received my package from Rik Pierce with the missing chimney and wood I needed to complete my "Crooked House". I also received the owl brackets that fit under the front window upstairs. They are really sweet and will need to be painted.
 The resin looks pitted but I am sure these will look perfect once they are painted.
As you can see from the photos, I still have quite a bit to do before I have a finished house. The hardest part is behind me though and now that the last of our Summer company has gone I can focus on finishing this up.

In the last picture you can see in the corner where the two walls meet my paperclay has a gap. I need to put a small amount of glue there and add some paperclay to fill in the gap. I was really happy to see that my baseboards ended up at the right level when the house was put together. Less work at that point. I have all of the wood for the roof prepainted and can start adding them. I also need to add a little more "wash" over my bricks. For a wash for your grout color it is about 1/2 cup water with 2 drops pf Hippo Grey and 1 drop of black paint added. You can adjust that formula to fit your needs. Once the bricks are completely painted I will add some more paperclay over parts of them so it looks like over the years it has fallen off, exposing the brick.

Saturday, August 14, 2010

BABY SHARING

I haven't posted a picture of one of my babies in awhile and thought I would share another one from the past. I then will get photo's of my Rik Pierce house to show you haw far I have come with it. I still have some work to do on it as I haven't had the chance to do a thing since the class other than gather(my favorite thing to do) all of the paint,glue, etc. needed to complete the job!
I hand sculpted the biscuit,pacifier and the little bead toy that Eliza is holding.

Friday, August 6, 2010

RIK PIERCE...........ELECTRIC WIRING

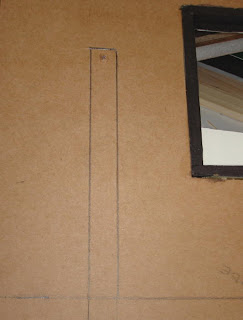
Once our interior walls had the paperclay finished and had dried overnight we started to wire the house. There will be a chandelier from the beams upstairs, a candle stick on top of the mantle and a porch light with a wire set up on the interior wall at the same point. I added one more light source downstairs too.  We measured 4 1/2" up the wall on the interior to make the first hole for the wires. It should end up being 5" up on the exterior wall.  I lined it up by the front door for the porch light. We used a bamboo stylus tool that Rik had made with a handle.
Now, You turn the wall to the exterior and draw a 1/4" line around the hole that you will use for the wiring.

Take your Stanley knife and hold it at a 45 degree angle and cut out a channel that your wiring will fit into.

Keep sharp blades in this knife at all times! It makes the job so much easier!

Your wiring will fit inside this channel just perfectly! I really loved finding out about this so much. You put your wire for the interior fixture into the channel that you have just cut and tie a small knot (interior side) in the wire to keep it in place. The next step is to carefully put a line of glue around the edge of the channel that you have just cut out,being very careful not to get it near any of the wiring. Glue a piece of Bristol board over the channel so it is protected. You can check your wiring after the bristol board has dried to make sure that you can move it freely and no glue has touched it. If you have a light source outside at that point(my porch light) you then make a hole in the bristol board and feed a wire from the outside into the channel and tie a loose knot in that to have it stay in place until you are wiring up your lights. You can coil both wires up and tape them to the interior wall while you paperclay the exterior wall. Your wiring is completely covered up and protected!!


It is such a great method to wire a house!!! I am hoping that when I am at a point to attach lights and the final step of connecting the wiring underneath the house it goes smoothly!

RIK PIERCE WORKSHOP continued

The next few days of the workshop we were putting the wood and paperclay on all of our walls. Interior walls were finished first. I made a wattle and daub on my upstairs back wall! Years ago when building, the inner wall was lathe work(wattle and daub).  Some of the older buildings have plaster that has fallen off and some of the inner lathe wall is exposed. I wasn't going to make one because I was scared to try.....LOL..I realized though I would miss out on a great chance to experience everything that Rik was teaching us so I made one!------->info here : http://en.wikipedia.org/wiki/Wattle_and_daub     You can also make a fence using this technique. First you cut small strips of Bristol board and then cut small strips of .032 thick wood strips and weave the wood with the paper. The part of the wall where I was going to have the wattle and daub exposed was painted black first and then the piece was glued in place after I painted it brown.. I then just covered the wall with paper clay and left a bit of  the inner wall exposed. The cracks in the wall showed up as it was drying and I decided to leave them. If you don't like the look when this happens you just add more paper clay and repair the cracks.


Sunday, August 1, 2010

RIK PIERCE WORKSHOP day 1 afternoon

After painting our fireplace/oven we set it aside and  attached the interior baseboards to our walls. We measured up 1/2 inch to accomodate the floor so it would fit right under them. We attached them with wood glue and a few dots of super glue the length of the boards. Rik said when you use the combination of the wood glue and dots of super glue it gives an incredible strong bond. Once the baseboards were attached we painted the wood and got ready to use the paperclay.
 Rik made these wonderful boards to roll the clay out on to insure that it would be 1/4 inch thick. It consists of a block of wood a little bit larger than a 12" linoleum floor tile(cheap one) with enough of an  edge to attach 1/4 inch wood around the edge. The "rolling pin" is a length of pvc pipe. You start to roll out your clay like you would a pie crust. Roll one way and flip it over and roll in the other direction. When you have your paper clay ready to go you cover it with plastic to keep it moist. Your other clay that is open should already be in a zip lock plastic bag. It will dry out fast if left uncovered.  Now, you need to prep your wall by smearing an even coat of wood glue all over the surface that you are going to attach the paper clay to. go right over any window or door opening because you will cut that away afterwards. You might not cover the whole wall with your first piece of clay that you roll out and will need to add more. Make sure that you feather the edge of the clay at the new seam. When you add clay to complete the wall,this step will prevent a large crack showing up as it drys.Now you must press a little bit with your hands and make sure that it is really touching every part of the surface. We then used a very inexpensive sculpting tool like a spatula and rubbed that all over the wall and make sure that the clay is really attached. Remove any air pockets that might have formed beneath the surface. The other end of the spatula tool had an angled cutter type of look. We cut by the baseboard to make sure the clay wasn't overlapping there. At this point you can cut away the clay covering up the windows or doors. Put all of that clay in your plastic bag. For texturing you wall at this point you can see a small paint brush by Rik's right arm. It is one of those inexpensive paint brushes that are about .86 cents each. He cuts them down about 1/3 of the way down and told us to pounce the brush on the table to spread some of the bristle's. Once it is ready pounce all over your wall and twist your wrist a little bit so you  have an uneven pattern on the wall. If you want to mark a section to look like exposed brick you can mark it in now. If you do that process you must remember that about 1 1/2 hours later go back to your "brick" and with a stylus clean out the grout lines to make sure they are deep enough. When you do this you can round the corners of your bricks just a tiny bit so they will look realistic. Set your wall aside if it is finished and let it completely air dry over night. Sometimes you walls while drying will have a few tiny cracks appear. You can leave them if you like the looks of them or fill them with a little bit of clay the next day...........more to come. I plan on taking a real good picture of the board to roll the clay out and will get the right dimensions of the wood and the lip. It is so great to have..........when the tile starts to look shabby and not work as well you can just buy a new tile and slip it in. Great to have this jig!! Too much in one post?? If you have any questions ask me! I plan to take a close up photo of the brush for stippeling and the board to roll the clay.