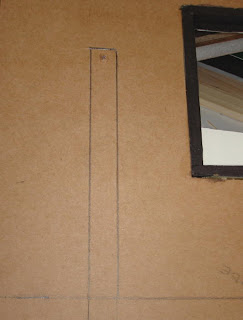
Now, You turn the wall to the exterior and draw a 1/4" line around the hole that you will use for the wiring.
Take your Stanley knife and hold it at a 45 degree angle and cut out a channel that your wiring will fit into.
Keep sharp blades in this knife at all times! It makes the job so much easier!
Your wiring will fit inside this channel just perfectly! I really loved finding out about this so much. You put your wire for the interior fixture into the channel that you have just cut and tie a small knot (interior side) in the wire to keep it in place. The next step is to carefully put a line of glue around the edge of the channel that you have just cut out,being very careful not to get it near any of the wiring. Glue a piece of Bristol board over the channel so it is protected. You can check your wiring after the bristol board has dried to make sure that you can move it freely and no glue has touched it. If you have a light source outside at that point(my porch light) you then make a hole in the bristol board and feed a wire from the outside into the channel and tie a loose knot in that to have it stay in place until you are wiring up your lights. You can coil both wires up and tape them to the interior wall while you paperclay the exterior wall. Your wiring is completely covered up and protected!!
It is such a great method to wire a house!!! I am hoping that when I am at a point to attach lights and the final step of connecting the wiring underneath the house it goes smoothly!


ok.jpg)


.jpg)


Thanks for the instructions :)
ReplyDeleteVery clever! Patty, do you know that name of the foamcore-type board the walls are constructed of? It looks like it might be gator board (hard to find around here). Did he give you a source for that by any chance?
ReplyDeleteThanks Patty!
ReplyDeleteI also cannot get gator board here. I am planning to use Easyboard instead. That is what Karin Corbin uses in her house building projects. It is a tile backer board used in houses for bathrooms or where ever tiles are used. I called around to tile companies here and found it. It comes in 1/4 inch and 1/2 inch. This wiring methiod will also work with that product.
Catherine, suprisingly enough, I called the one and only "real" art supply store in my town today and he DOES carry gatorboard. So I am paying him a visit next week.
ReplyDeleteThe tilebacker board I've seen is awfully heavy, especially at 1/2 inch, no? The gatorboard is extremely light but very sturdy.
Hey girls! The gator foam is so light weight!!! I am thrilled with it. We used the 1/2" thick one. In fact when I get to the chiminey and start to attach that it is 2 pieces of 1/2" foamcore glued together. I left mine at the class which is too bad but Rik said he will send me another piece. You can get Gator Foam from Dick Blick's. I need to take a picture of my house to share with you so you can see how far I got. I still need to attach all of the slats to my roof. They are already cut to size and painted.
ReplyDeleteCatherine!!! You could make yourself the most incredible dollhouse using this product. It is just like foam core....the only difference I can see is that the paper covering is much sturdier.
Am I correct in assuming that only the wire is hidden in this channel? :o) I have always have my light wires channelled into the wall, but the actual socket strip has always been kept outside of my kits. I have have them hidden, but they are still accessible if anything goes wrong (which always does!). I would never paperclay etc over any of my sockets because you can't get to them.
ReplyDeleteI didn't know that there different types of board! We can buy foanboard overhere...mine isn't 1/12 inch thick though. Unsure if you can buy different thickness's or brands in the UK. :o(
Michelle xx
Michelle, I think with Rik's method your socket strip would be hidden underneath the landscaped frame so you have easy access. He keeps the wires long so if there is a problem you can pull the wire closer to you to work on it instead of trying to have your hands inside the dollhouse and trying to fix it. He doesn't use wall plugs at all. I suppose because most of his buildings are period pieces and they would look out of place. There is a woman in UK that gives classes similar to Rik Pierce. I will try to find her name and info. The Gatorfoam or something similar must be there somewhere....we used half inch size.
ReplyDeleteMakes it look so easy :-)
ReplyDeleteI plan on using Gator-board when I eventually getting round to build my pub.
Blicks do it but I think they can be pricey. Another place to look are sign making stores.
There is also a place in LA but I can't recall the name. they were the best price but you had to buy a lot of it.
When / If it comes to me I'll let you know.
Licensed electrical contractor should be hire for any type of electrical work in residential or commercial areas.
ReplyDeleteelectrical contractor services